Pinball Tutorial· 18 min read
May the Force Be With You: Learn to Play Star Wars: Fall of the Empire


Like what you're reading?
Get pinball news, analysis, and deep dives delivered to your inbox.
Get pinball news, analysis, and deep dives delivered to your inbox.
In 1992, Data East hired a new designer to their steadily growing pinball division: John Borg. His first game, Star Wars, sold gangbusters for the company in part because of its theme but also because of the new design skills he brought to them. Like many of Pat Lawlor’s best tables, Borg’s designs rely on a mix of stop-and-go and flow shooting styles that emphasize control. It only makes sense that over 30 years later, Borg would return to his very first theme, now with the technological expertise Stern had developed in the interim.
Yes, Star Wars: Fall of the Empire is yet another machine based on the original trilogy, but the theme at this point has become quintessential to pinball and this game is able to do enough on its own to justify returning to the theme; even less than 10 years after Stern’s prior attempt. This machine primarily focuses on aspects of the movies that weren’t covered in the previous releases and is targeted towards a newer generation of players than many other Stern releases of its era, but that doesn’t mean it’s any easier. The playfield is packed with tight shots, many of which can be made with backhands from either flipper, and playing out of control will result in punishment. This machine is likely going to be omnipresent across pinball locations for the next few years thanks to its theme, so what better time than now to discuss your best methods of getting a high score on it?
The third Star Wars pinball machine based on the original trilogy, incorporating aspects of the movies that were ignored in previous titles and targeting a newer generation of pinball players across all skill levels.
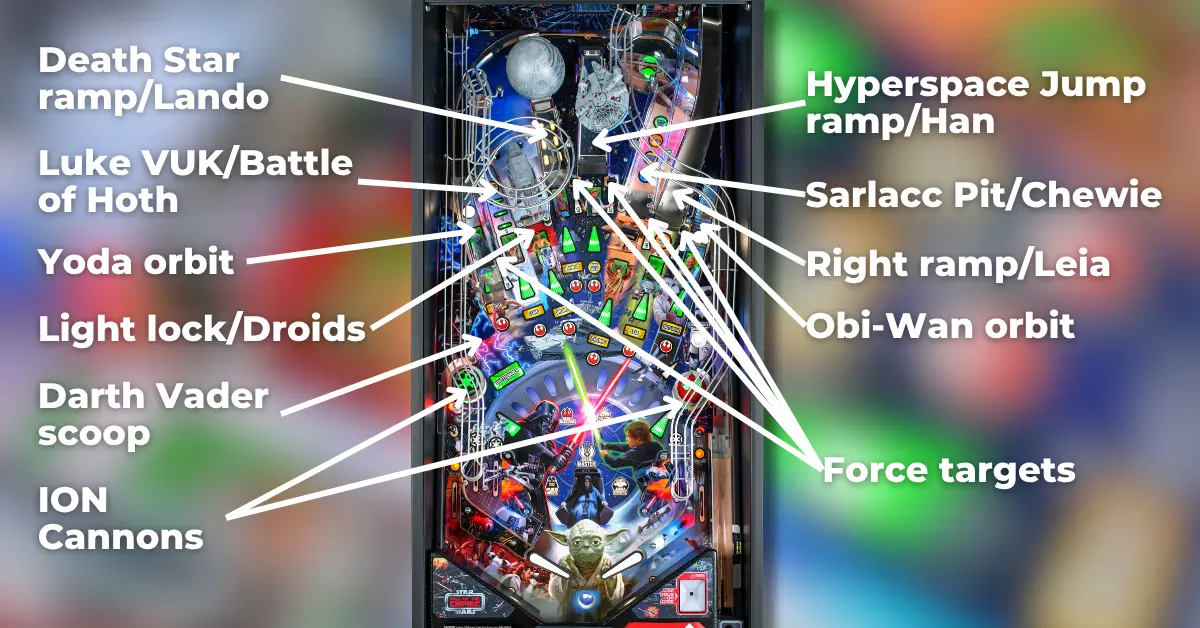
Star Wars: Fall of the Empire, like many John Borg designs, is iterative of his earlier designs: being a “fan” layout with a bash toy that can be hit primarily from the right flipper, and two ramp shots, one relatively easy and the other a bit more difficult. Gating the various shots are five targets that spell FORCE, used to light missions, and can be completed even when multiballs are running. A design aspect unique to this game are the two ion cannon pop bumpers on the very far left and right of the playfield, which make it more difficult to recover balls bouncing around the slingshots but are a double-edged sword as they eventually light the shot multipliers. Darth Vader’s scoop is near the left bumper, which releases the ball at a fast speed typically to the middle of the right flipper; on some copies, drop catching can help with this feed, but on others, your best bet is to flip and hope to hit a bailout shot.
The left side of the playfield has four equally important shots. Yoda’s orbit is the left side of an orbit that passes around the entire game and is the easiest way to rack up spins towards lighting letters in JEDI and qualifying the ball save. The Luke shot is a VUK that spirals around a model of an AT-AT walker and can be hit from either flipper, even from the left flipper with a precise shot. Locks for Battle of Hoth multiball are also scored at the Luke shot and can be lit at the “light lock” target, which also corresponds to the droids during modes/combos. The final left-side shot is the Death Star ramp, which has a target at its apex that lowers to reveal the ball lock for Death Star multiball – up to 3 balls can be locked there that release to the flippers. The Death Star ramp is also Lando’s shot during modes/combos.
The center ramp is the highlight of the playfield. On the Pro, the ramp is a simple jump ramp that sends the ball through the “hyperspace” back panel and to the left flipper, but on the Prem / LE the center ramp shifts positions, acting as a target if it is lowered but raising with right ramp shots or center ramp hits. The center ramp is generally the easiest shot in the game and can be hit from either flipper regardless of the ball’s speed, corresponds to Han during missions, and advances the Falcon when the blue hyperdrive generator under the Falcon is lit. Light up the generator by shooting the right ramp first (or for the first Falcon feature of a game, the center ramp).
Four more shots are located on the right side of the playfield. The Sarlacc Pit is Chewie’s shot during modes & combos; represented by a whirlpool ramp where every spin changes the mode that will start when the ball exits it, and is defended by Jabba’s guard, Salacious Crumb. The drop target isn’t as deadly as many other drop targets placed close to the flippers, and is best shot as a backhand, but strong shots that get many spins can only be made with direct shots from the left flipper. Passing around the pit is Leia’s right ramp, the steeper of the two ramps but one that can still be made as a backhand on some copies. Shooting the ramp awards TIE fighters and eventually starts hyperspace loops or lights extra ball. Obi-Wan’s orbit is on the opposite side of Yoda’s orbit and despite seeming narrow, can be reliably hit from the left flipper regardless of timing. The last shot, excluding another ion cannon bumper, is a hidden standup target used to collect Stormtroopers and cash out the Stormtrooper hurry-up award once enough have been scored.
Scoring on Star Wars: Fall of the Empire is average for a Stern release from this time, with scores of 300M+ often winning tournaments and the best players being able to surpass a billion. Taking advantage of the shot multipliers whenever they show up after enough bumper hits, and playing your multiballs effectively, are the best ways to get a high score.

Every shot is lit for a skill shot as soon as the ball is plunged. Hitting a shot within 5 unique switch hits scores a super skill shot worth 2x the normal value of 3M, but only one skill shot can be made per shot until all 11 are completed.
Try using the ball save opportunity at the start of each ball to aim for the “light lock” target and get early progress on advancing towards Battle of Hoth multiball.

Rebel missions are the “main modes” of Star Wars: Fall of the Empire. There are 24 total missions, 3 per character, that can be lit at all the major character shots by spelling FORCE at the targets. The first mission is easy to light but subsequent missions get tougher and tougher to light. During missions, shoot the blue shots to progress through the mission or the white shots to build the value for the next shot. Rapidly flashing blue shots score 2x.
Each character insert color corresponds to the difficulty and value of the next mode. Yellow = easy, green = medium, and blue = hard. If any character’s mode is completed, the next mode started at that character will be 2x its prior value.
The characters also give unique benefits to the modes started at their shots, allowing different features to build the shot value or progress through the mode easier:
Once a mission for four unique characters is played, the left scoop will light to start Not a Jedi Yet when no other modes are running. All shots are lit to score a percentage of the mode scores up to 3 times each, with the left scoop, Luke VUK, and Sarlacc pit lighting after each set of 3 shots are made. With good mode performance, Not a Jedi Yet can be worth substantial points (upwards of 800M if completed), but this isn't a reasonable competition goal due to the incng difficulty of lighting & playing missions.

Shoot the center ramp while the hyperdrive generator under the Falcon is lit to advance towards starting Falcon Features. For the first feature of a game the center ramp will light the generator, but for subsequent modes, the right ramp must be shot to light the generator first before shooting the center ramp to advance.
The Falcon features are played in a set order, with the first mode turning into a multiball that can be worth a substantial amount of points in the early game:

Shoot the drop target blocking the Sarlacc pit enough times to gain access to the whirlpool ramp. The next time the ramp is shot and the ball spins around there, the player will be prompted to select a mode with the action button, which changes with every spin in the whirlpool. There are three Jabba events to play through:
The fourth Jabba event is called sarlacc escape and can only be started once the other three modes have been played. This is a hectic 3-ball multiball where the player must collect 50 switch hits to light the pit for a jackpot scored once per spin around the pit, with the first two jackpots adding a ball and the fourth jackpot lighting the left scoop on a hurry-up to complete the mode.

The return lanes cycle with the flippers and alternate between lighting dark side mystery or qualifying a Vader mode with the next shot to the left scoop while out of a mode. After shooting the lit scoop, a variety of shots will light red to start a mode.
During each Vader mode, all shots are lit to score points and advance through the scene, but the shot that started the mode will score points and add +1x to the next shot's value. Once all the required shots have been made, the left scoop will light to complete the mode. The length of each mode ranges between 3 to 6 shots:
After completing a Vader mode, for the rest of the ball, dark side scoring will be active. A random purple shot will move around with each shot made and score 2% of the value built up from completed Vader modes. Hitting 5 lit dark side shots will light extra ball, and hitting 15 lit dark side shots will light the left scoop for dark side multiball, which uses the current dark side scoring award as the jackpot value.

There are two main multiballs on Star Wars: Fall of the Empire. Multiball stacking is disabled, but if the player starts the “lightspeed escape” Falcon feature before collecting the third lock for Battle of Hoth multiball, the player will be able to play these two multiballs together.
During any multiball, shoot the Sarlacc pit and collect 10 spins in the whirlpool to light the action button for add-a-ball. 10 more spins are required for every subsequent add-a-ball in a game.
Jackpot values are higher if the player completed modes before starting the multiball, and progression towards jackpots is made easier if the player collected combos before starting the multiball. If the player started a force mission at a character shot, then the next shot to their lane will score 2x the jackpot value, 3x the jackpot value if the mission was completed. If a combo was made at a character shot, the next shot to their lane will award 2 jackpots worth of progress, 3 if the same combo was made twice.
Every right ramp shot awards a TIE fighter, with 2x TIE fighter progress from center ramp – right ramp combos on Prem / LE models. Collecting enough TIE fighters either starts hyperspace loops (at 5, 15, or 45) or lights extra ball at either the Luke VUK or right ramp, changing with slingshot hits (at 10, 30, or 60).
During hyperspace loops, repeated shots to the center ramp will increase a jackpot that can be scored with a right ramp shot. The mode lasts 30 seconds and if time runs out, the jackpot opportunity is lost.
Hyperspace loops can be a good side mode if the player is currently in lightspeed multiball, as each center ramp shot will score a super jackpot and increase the value of the hyperspace jackpot.
The bumpers are incredibly dangerous shots but qualify shot multipliers when enough hits to them have been made. Apply a shot multiplier to the next shot made by hitting enough bumpers and then shooting the shot you want to place it on. The progress of qualifying shot multipliers becomes tougher over the course of the game.
Great places to apply shot multipliers are the center ramp if lightspeed escape hasn’t been played yet or you want to score as many points as possible out of Rancor mode, the Luke VUK or droids target if Battle of Hoth hasn’t been played yet, or the Death Star ramp if you are close to starting that multiball. Putting a shot multiplier on the Luke VUK also guarantees higher value out of mode completion shots, the Rancor Jabba event, the family reunion Vader mode, and Battle of Hoth super jackpots if they are started on the same ball.
The return lanes alternate between lighting Vader modes and lighting the mystery award at the left scoop. The two lane sets are separate, to prevent players from repeatedly shooting the center ramp to complete sets of return lanes.
Mystery will typically award 15M if it is scored during a multiball, but in single-ball play it can light the next set of rebel missions, advance falcon, advance JEDI, start stormtrooper hurry-up, advance any multiball (lighting or awarding locks, but won't start either), or make progress towards lighting shot multipliers.
On the Prem / LE, the third mystery award outside of a mode will start mynock multiball, a quick 3-ball multiball where the center ramp is lowered for repeated shots worth 10M each. Collecting 10 jackpots will light an extra ball, and every 10 jackpots afterwards will award a 25M bonus. The center ramp jackpots are not affected by shot multipliers.

The hidden standup target near the right pop bumper collects Stormtroopers and eventually starts a hurry-up at that target to collect a value starting at 10M + 250k per return lane completion. Cashing out the hurry-up increases the multiplier for the next one on the same ball by +1x and increases the bonus multiplier, which caps at 15x. The first hurry-up requires 2 Stormtroopers to light and subsequent ones increase the requirement by 1.
Stormtrooper hurry-ups, despite running in the background a lot of the time, are worth cashing in quickly, especially during a long ball. End-of-ball bonus can also be sizable on this game and stormtrooper hurry-ups help pad this bonus out.
Every spin advances the JEDI letters on the top right of the display. Once JEDI is fully spelled, the outlanes will be lit for ball save, but the player must press the action button before the trough is registered to save the ball and keep playing. During multiball, the ball save happens automatically without needing to press the button.
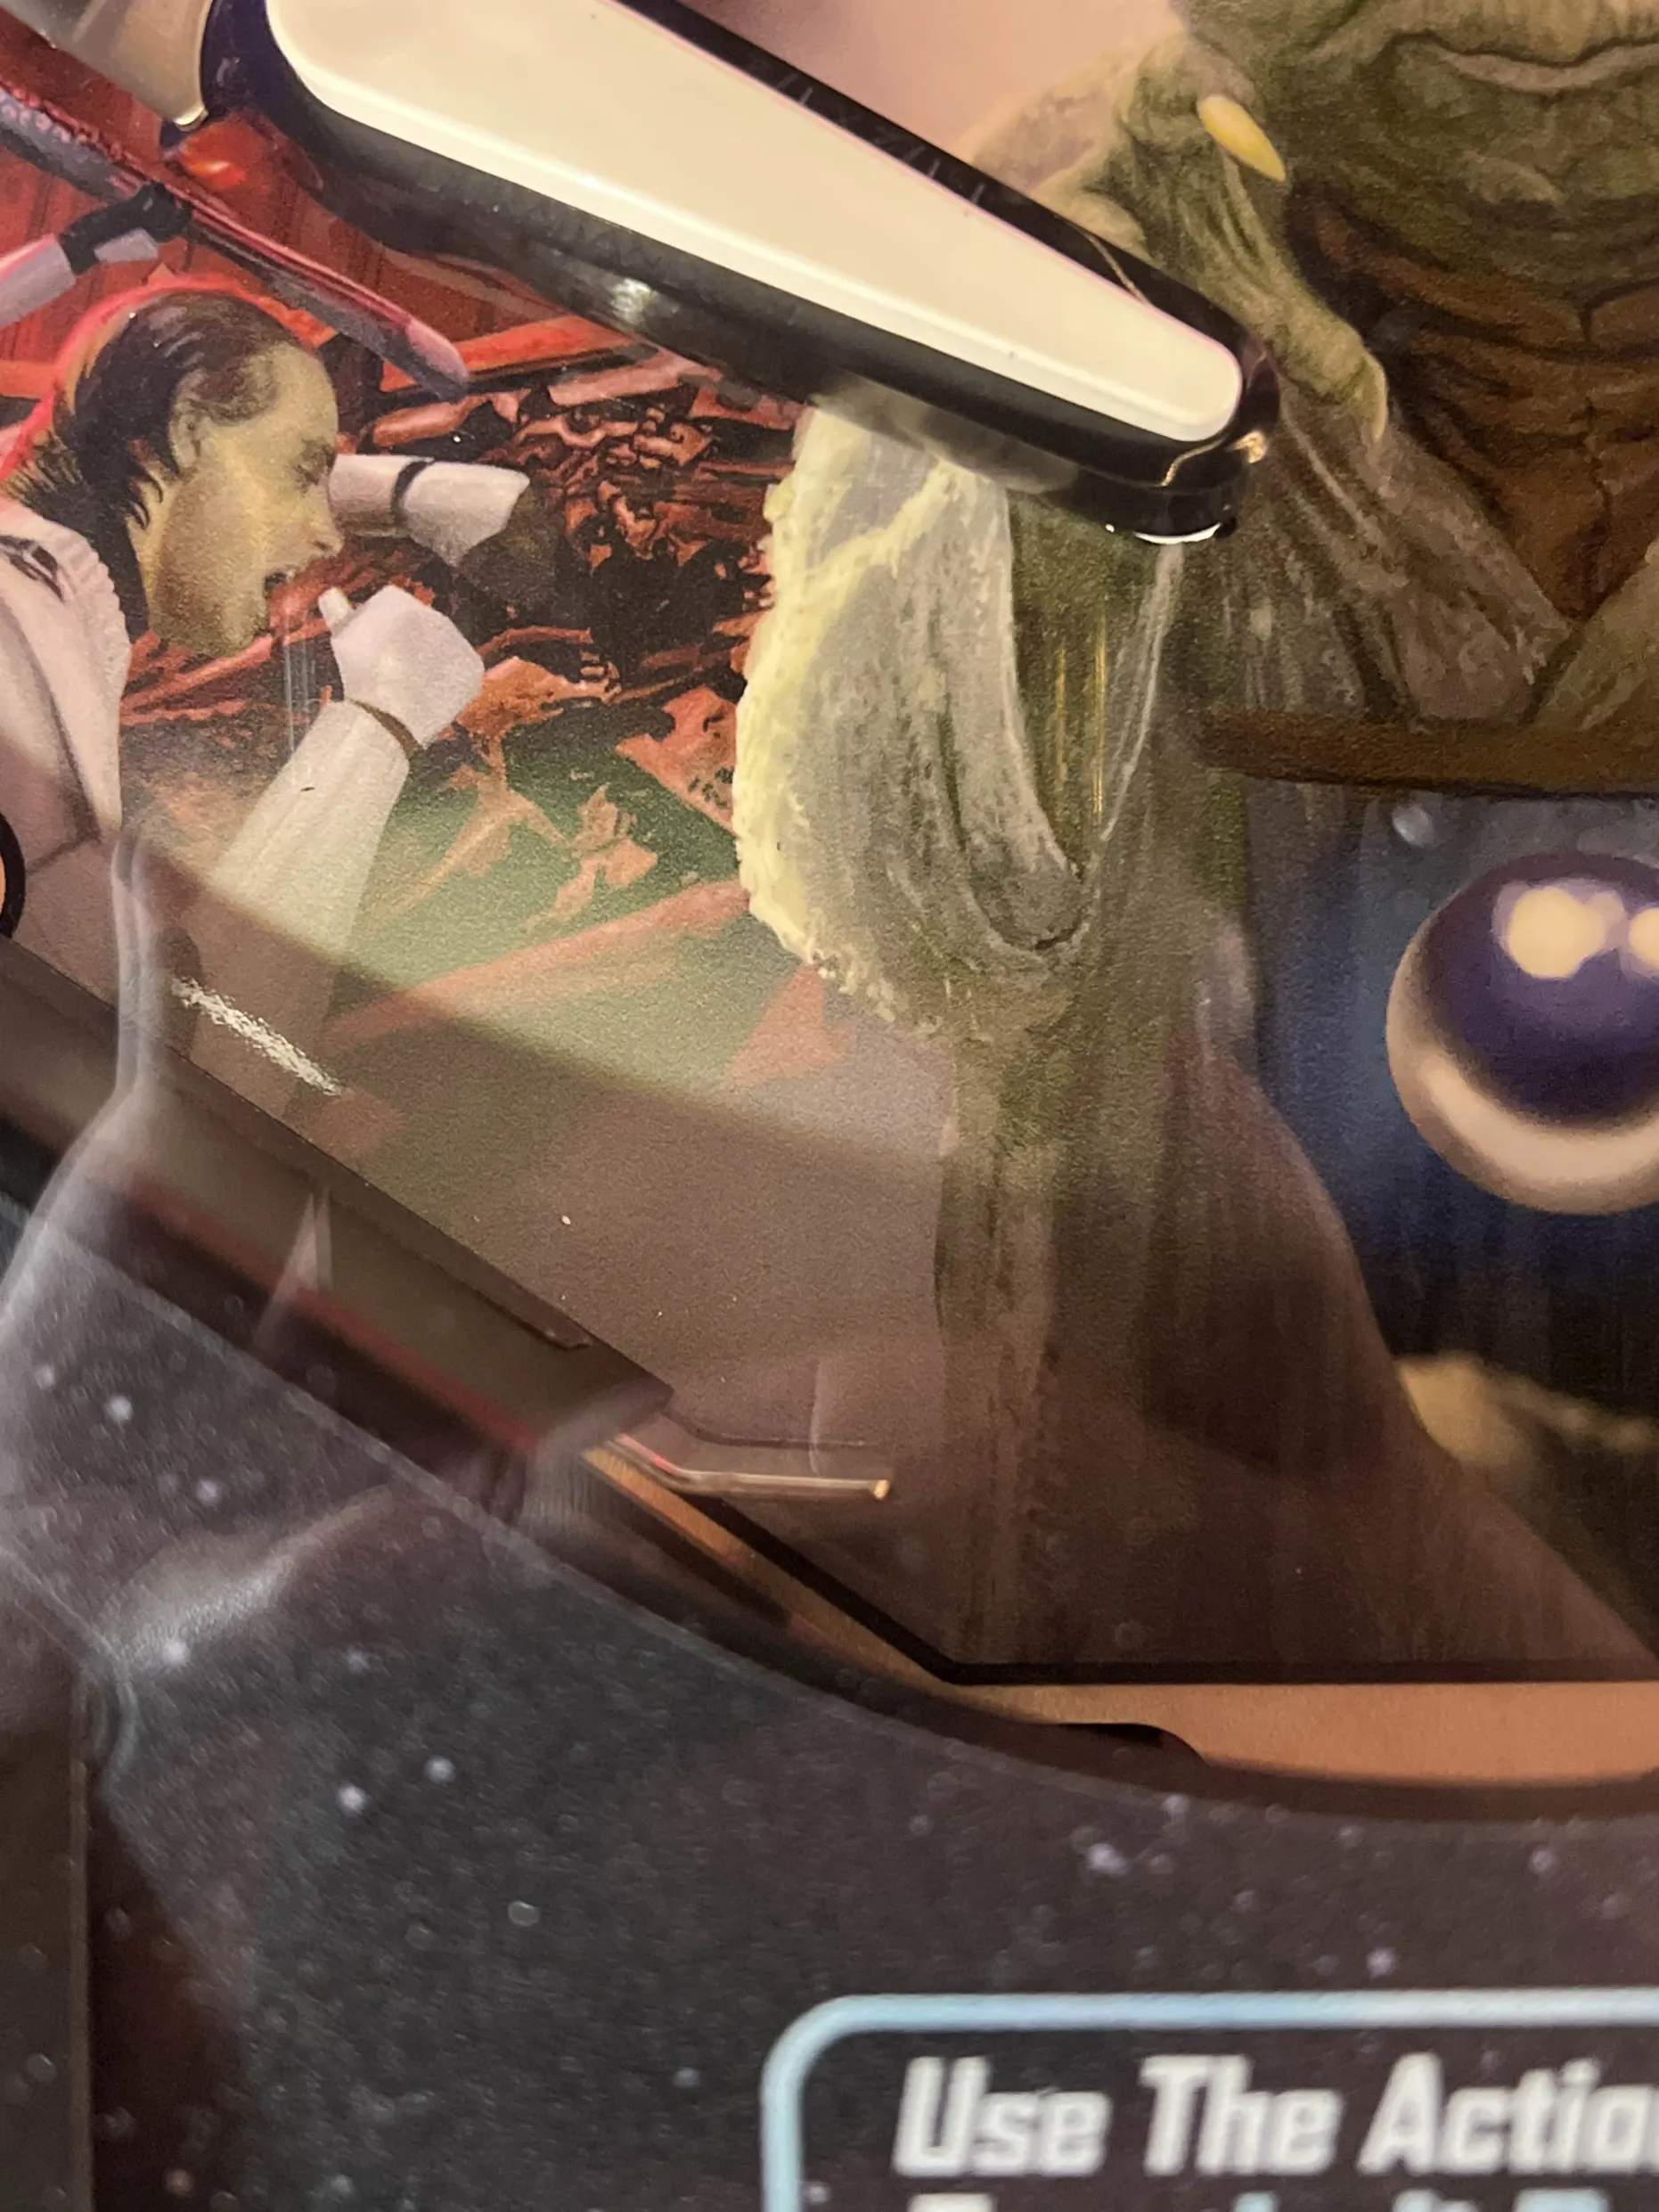
On the Prem / LE this rule behaves quite differently. After collecting the J and E in JEDI, the player will have 2 charges of the magnet below the flippers to possibly save the ball, with the goal of sending it into the gap between the right outlane and the plunger by "pulsing" the ball from side to side using the small divot near the apron, as seen in the provided photo. If JEDI is fully spelled, pressing the action button when an outlane drain is registered will grab and then fling the ball back into play, with 3 charges left if the player still needs them to save the ball. Pressing the button more than once, however, will cancel the ball save.
Rip the spinners early and often to make sure that you can take advantage of these ball saves! Just be aware that JEDI cannot be advanced during any multiball mode.


No comments yet. Sign in to be the first.