An Easy Step-by-Step Guide to Installing Stern Insider Connected on Your Pinball Machine

An Easy Step-by-Step Guide to Installing Stern Insider Connected on Your Pinball Machine
Photos by
An Easy Step-by-Step Guide to Installing Stern Insider Connected on Your Pinball Machine
Graphics by
An Easy Step-by-Step Guide to Installing Stern Insider Connected on Your Pinball Machine
Published on
October 24, 2022
Updated on
October 24, 2022
Read time:
4
minutes
No items found.

Image Gallery

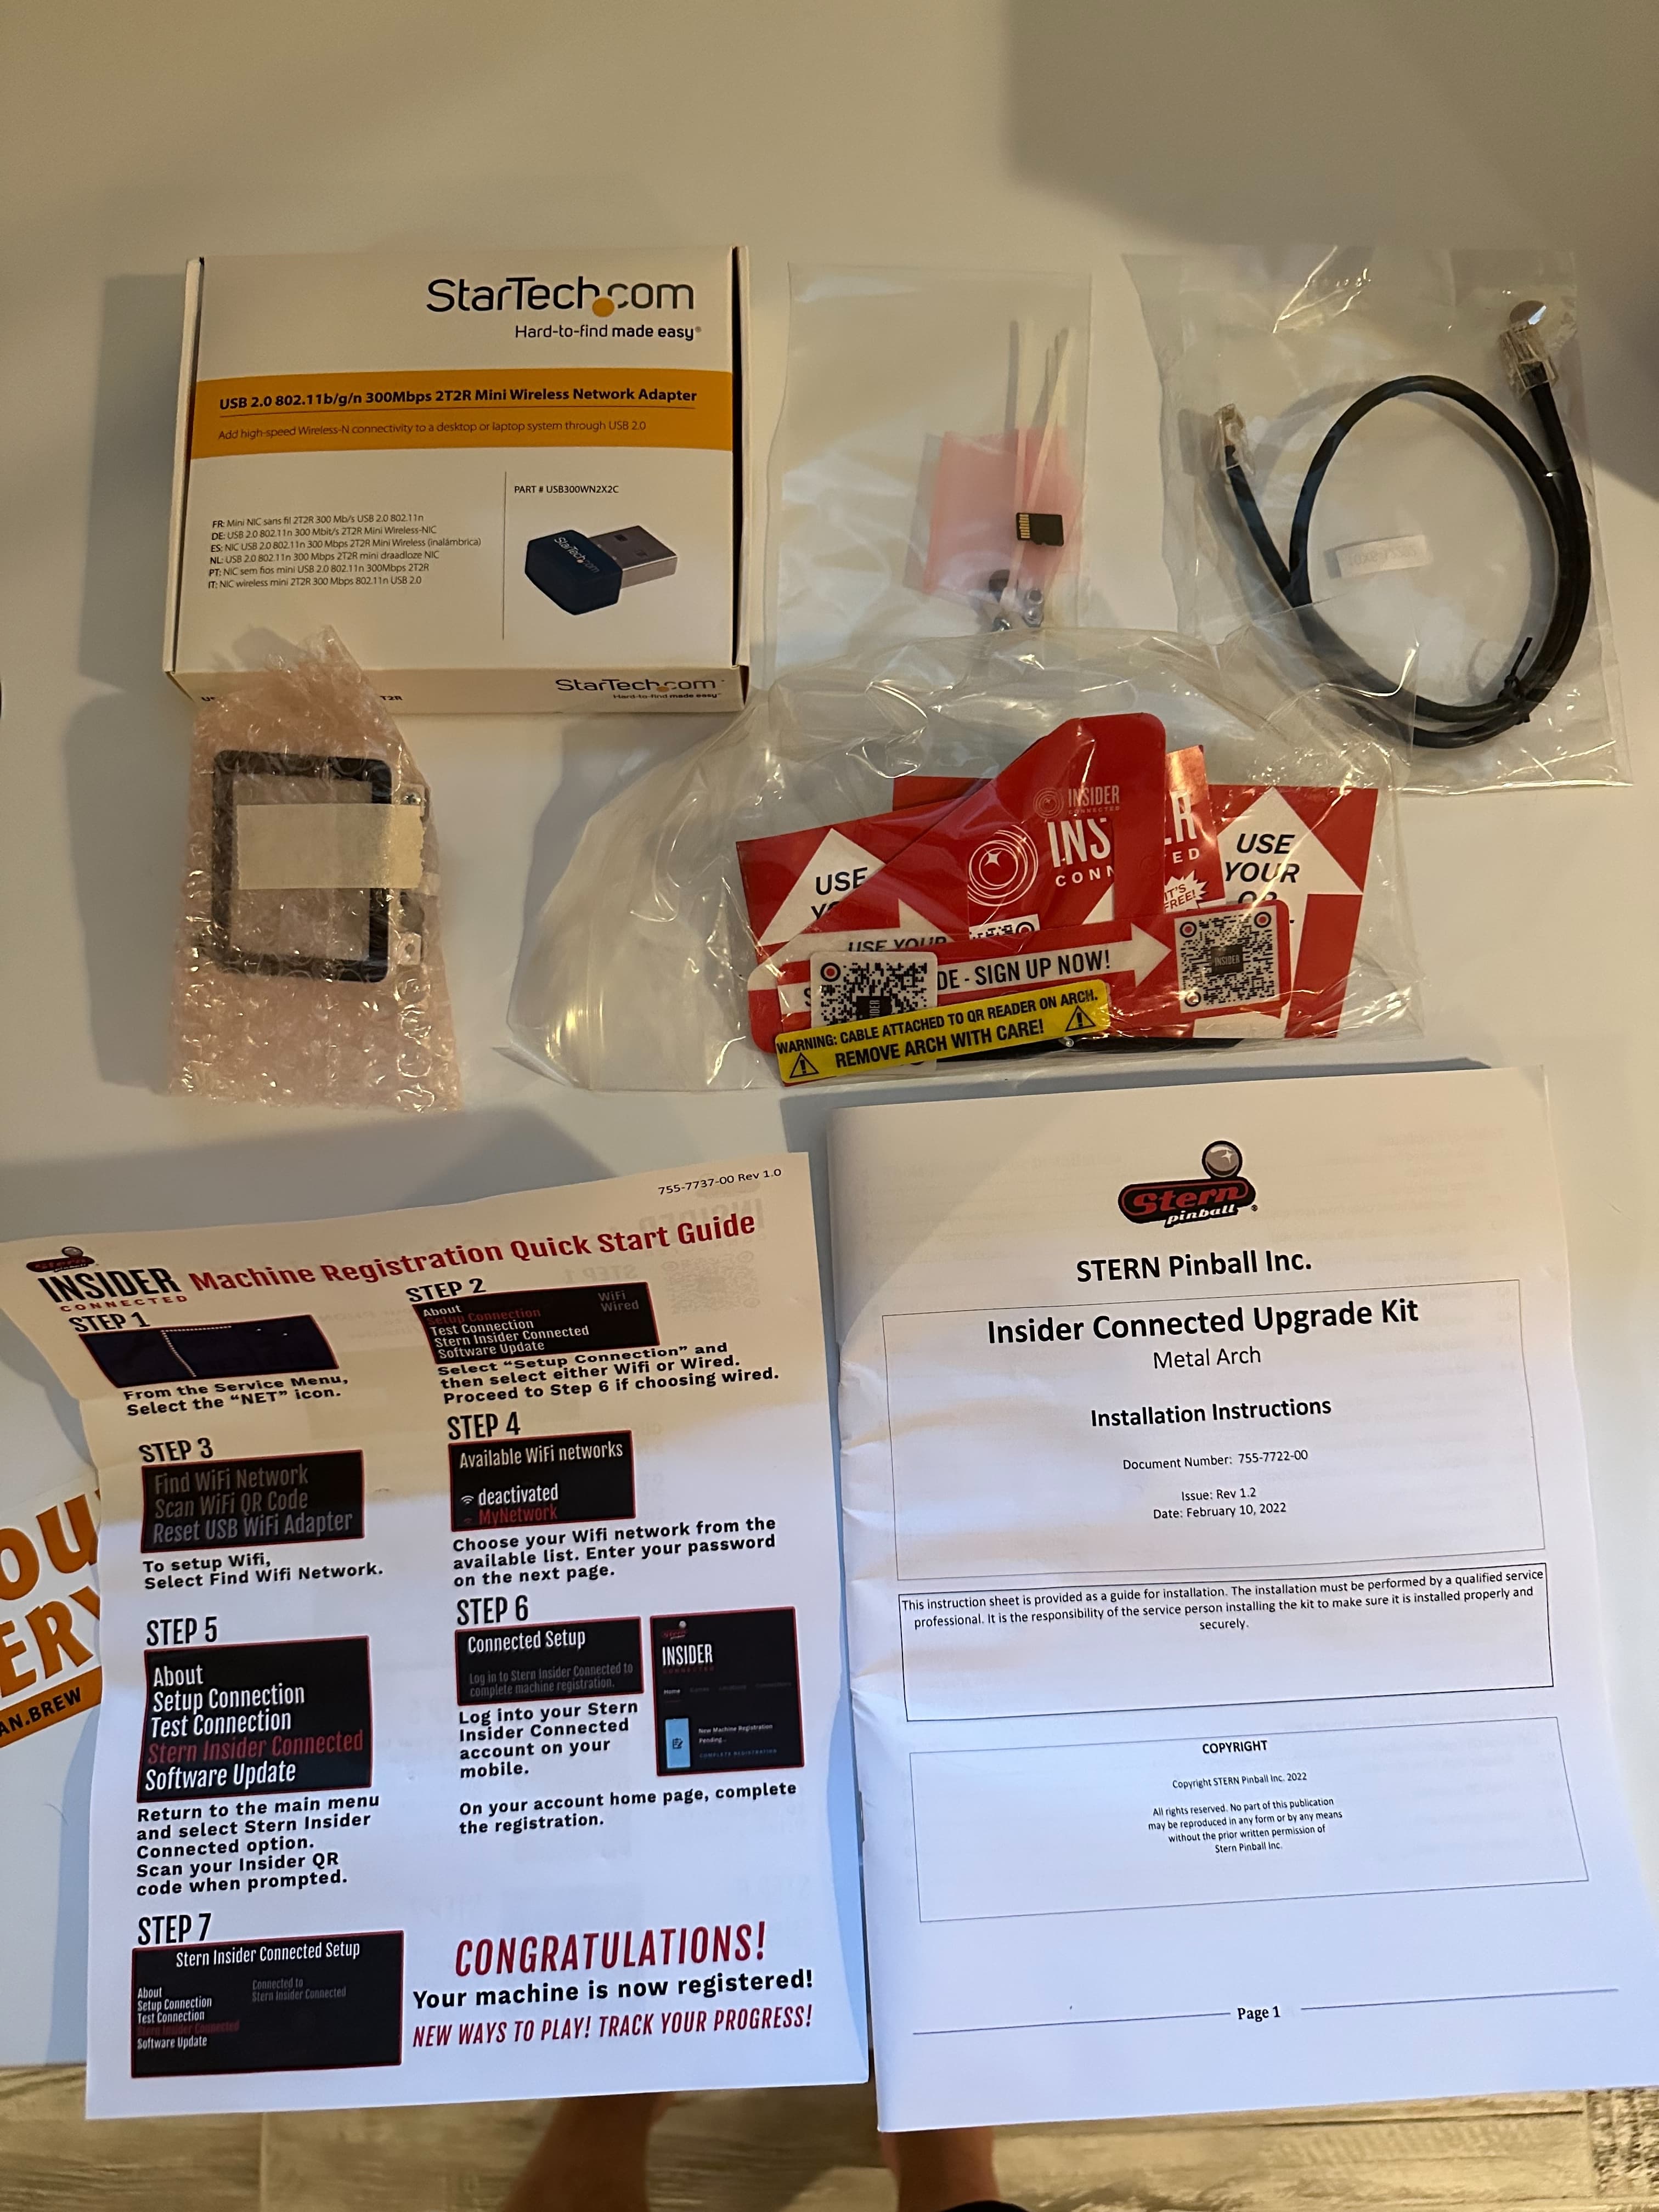
If you're a fan of Stern pinball machines, then you're going to love the new Stern Pinball Insider Connected kit! This amazing new system allows you to connect your machine to the internet and access a variety of features, including game updates, special achievements, progress tracking, and more. Installing it can be a little tricky, so we've put together this step-by-step guide to help make it as easy as possible!

What is Stern Insider Connected

Officially launched in 2021, Stern's Insider Connected program is a pretty big technological leap forward for Stern Pinball. Insider Connected adds an internet-enabled social and achievement layer to their incredibly popular pinball machines. Plus adding an Insider Connected kit to your machine brings wifi connectivity which results in some quality-of-life updates like automatic code updates and score tracking (when logged into your account).

While Insider Connected is only available for a subset of Stern's newer releases, it's already been discussed as having a major positive impact on the number of people playing Stern's machines both at home and on location.

Where to Buy Stern Insider Connected Retrofit Kit

New or new-in-box releases from Stern should ship with Insider Connected already installed on the machine. If you're looking to add Stern Insider Connected to an older machine you already own, you can do so through your local Stern distributor, or directly through Stern on their online shop.

How Much is Stern's Insider Connected Retrofit Kit?

An Insider Connected Retrofit Kit will set you back $199, before taxes or shipping fees.

What's Next for Stern Insider Connected?

Currently, we know that Stern is working to bring additional Spike 2 system titles to the Insider Connected platform. Thanks to interviews with Stern's George Gomez, we also know that Stern is working on a dedicated mobile app for users (instead of a web-based app) and on integrated payments for location operators, among other planned feature releases.

What Tools Are Required for Installation?

  • A #2 Phillips Screwdriver
  • A 1/4" Nut Driver
  • A 11/32" Nut Driver

How to Install the Stern Insider Connected Kit

Note: this guide is written for the install of a Premium/LE Insider Connected kit, however the process for the Pro install should be mostly similar.

  • Buy a Stern Insider Connected retrofit kit from your local distributor or from Stern directly. Note they make different kits for Pro tier machines versus Premium and LE tier machines.
  • Wait for your new Insider Connected retrofit kit to arrive in the mail. When it does, open the packaging for your fancy new pinball tech. Your kit should include everything you need to install the device in your machine including QR code scanner, WiFi connectivity dongle, cables, memory card, installation hardware, decals/stickers, and a detailed instruction booklet.
parts for your stern insider connected kit
  • Before you start installing your retrofit kit, you'll want to make sure you're signed up for your free Stern Insider Connected account. Go here to sign up for Stern Insider Connected, and complete the registration process before moving forward.
  • You'll also want to make sure your game has already been updated with the latest code, in order to ensure it is ready to work with your Insider Connected kit. Go to Stern's website to find the latest code for your game, download to a USB stick, and follow update instructions.
updating your game code before installing stern insider connected retrofit kit
  • Once your game code has been updated, you'll want to focus on removing the arch from the playfield itself, as the QR code reader will live on either the right or left side of your playfield arch, with cabling running beneath the playfield.
  • Removing the playfield arch is a surprisingly easy task if you've never done it before. Remove the playfield lockdown bar and glass so you can raise your playfield into the service position.
raise playfield into service position stern pinball insider connected install
  • Use your 11/32" nut driver to remove the two nuts and washers that secure the arch assembly to the playfield. Set the nuts and washers aside for later.
  • Lower your playfield so that the rubber feet on the service rails are resting across the front cabinet rail. It should look something like this.
  • Using your #2 Phillips screw driver, remove the two screws from the hanger brackets. Set these aside for later.
  • You should be able to now remove the arch assembly from the playfield. Set it aside for later.
  • Using your screw driver, unscrew the right side LED board. You can remove and discard the existing screw and spacer.

  • Then, using the provided screw referenced in the installation booklet, screw in the LED board into the same spot it was removed from (just without the spacer).
  • Take your playfield arch and flip it upside down. Use your 1/4" nut driver to remove the 3 nuts holding the right-side plastic piece. This is where your QR code reader will go!
  • Following the instructions in your installation booklet, use your 1/4" nut driver to attach the QR code reader assembly to the arch, using the nuts that were removed in the previous step. The assembly should only align one way, so this should be hard to mess up! Make sure you've already removed the protective plastic film from the front face of the reader before installing in the arch.
  • Take your provided ethernet cable (or the RJ45 to be specific) and attach it to the QR code reader. This cable gets threaded through the bottom right hole on the playfield, near the LED board that you just adjusted.
  • Re-install your playfield arch. Start with the hanger brackets and re-inserting the phillips head screws.
  • Then, raise your playfield again, and re-attach the nuts and washers from an earlier step.
  • Finally, take the ethernet cable you threaded through the playfield and plug the other end into the available slot on your node board on the left hand side of the playfield underside. Feel free to use the provided cable ties to secure the cable appropriately.
  • At this stage, you can feel free to add provided decals and stickers as desired (we didn't do this step, but we don't put our machines on location either).
  • You should be done with work on the playfield now and can move onto the backbox. Your QR reader should look something like this fully installed.

  • Take the provided SD card and install it on the CPU board into the empty memory expansion slot.
  • Then, take your USB WiFi adapter and install it into one of the USB slots on the CPU board (where you would normally insert your USB stick for code updates).
  • Now, put everything back into place (backglass, playfield glass, lockdown bar, etc.) and boot up your game like normal.
  • With the game booted up, access the service menu.
  • Go to 'NET' Stern Insider Connected Setup
  • Select the "Setup Connection" step, followed by "WiFi" for a wireless connection.
  • Click on "Find WiFi Network" then select your WiFi network and enter your password.
  • The game should successfully connect to your network at which point it will display a QR code and information about your connection. You can use the QR code to quickly add network information to additional machines.
  • Next, you'll want to register your machine with Stern Insider Connected. Go back to the service menu and select "Stern Insider Connected Setup" then select the "Stern Insider Connected" menu item.
  • Pull up your Stern Insider Connected QR code on your phone and scan it with your newly installed QR reader.
  • Then, go to your Insider Connected account on your phone or computer, and go to the "Machines tab" there you'll be able to finish the machine registration process.

Now you're done! Depending on your technical proficiency, all told this process should take about 30-60 minutes to finish. Now you'll be able to take advantage of automatic code updates, set up Home Team if your machine is for home use, track your scores and achievements, and more.

Good luck!